
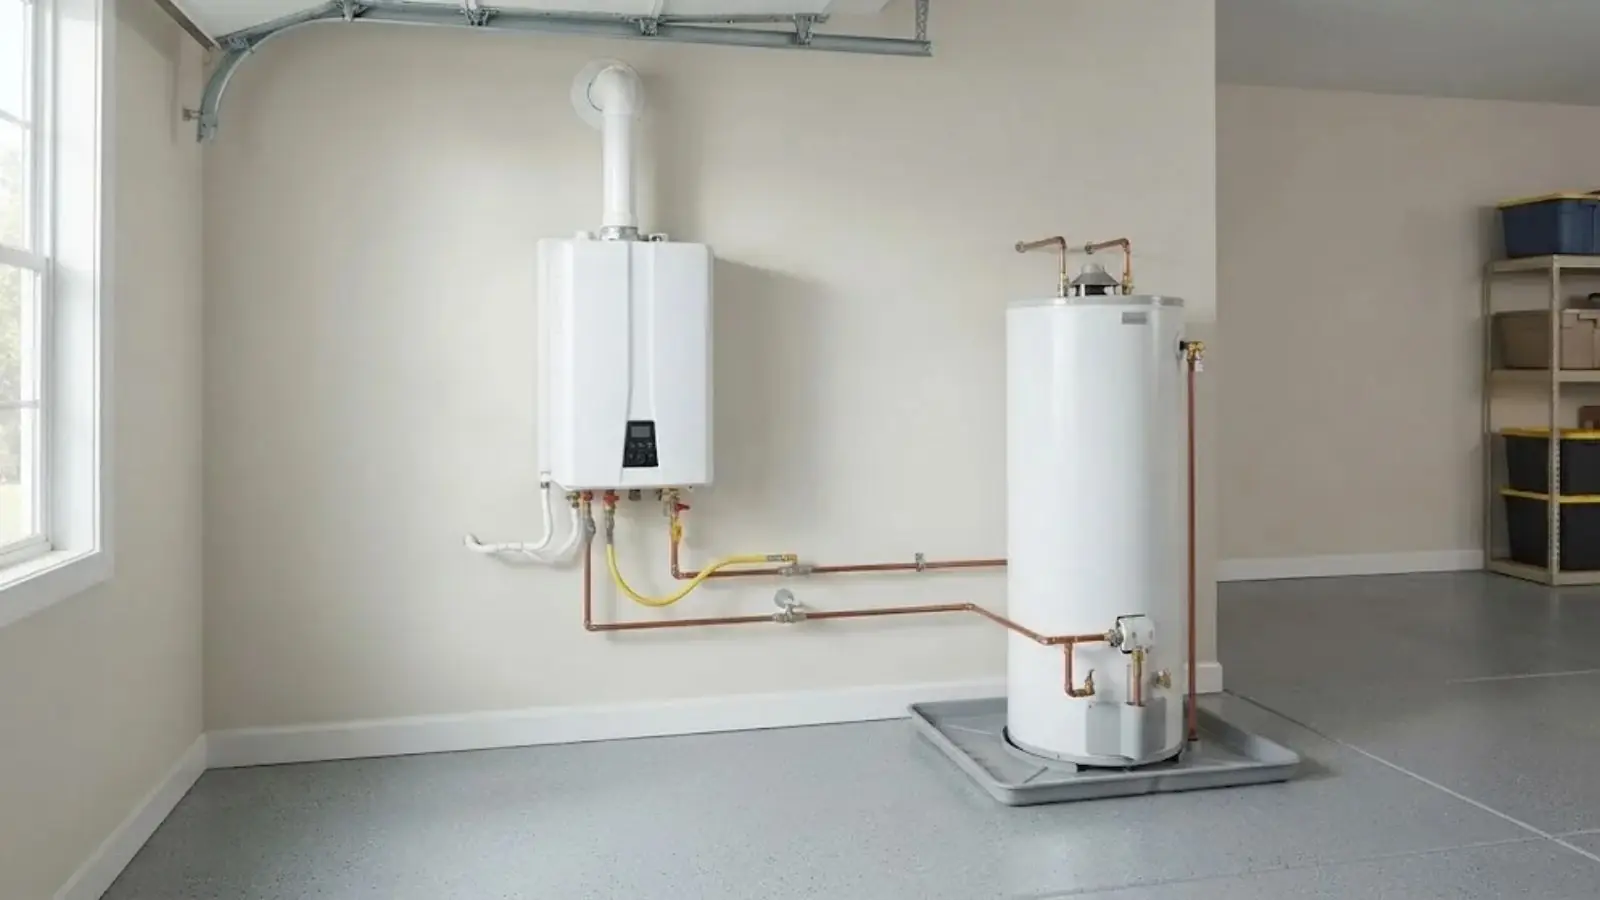
The short answer
It is easy to understand and easy to get wrong. A like-for-like electric tank in a spot with good access is the most approachable version. A gas unit with a vent pipe is where a small mistake can put carbon monoxide in your living space.
Most of the work is plumbing you may have done before, such as shutoffs, flexible connectors and a drain. The parts that carry real risk are the fuel connection, the exhaust path, the pressure relief valve and the electrical hookup. If any of those make you hesitate, that hesitation is useful information.
The rest of this article walks through the job in order, then gives you a table to sort your own situation into DIY, helper-needed or professional-only.
What the job involves, start to finish
A straightforward replacement of the same type and size follows the same order every time.
Shut off the energy and water
Turn the gas control to off or flip the breaker, then close the cold supply valve and open a hot tap upstairs to break the vacuum.
Drain the old tank
Attach a hose to the drain valve, run it to a floor drain or outdoors, and let it empty, which can take a good while on a sediment-heavy tank.
Disconnect and remove it
Break the water connections, the gas union or electrical wiring, and the vent, then walk out a tank that can still weigh well over a hundred pounds with a helper or a dolly.
Set and connect the new unit
Level it on the pan, make new water connections, attach a new relief valve with its own discharge pipe, and reconnect fuel or power with new fittings.
Fill, purge and test
Open a hot tap, fill until water runs steady, then check every joint, test gas fittings with leak solution, confirm the vent draws, and only then restore energy.
Where a swap goes wrong
Gas is the first trouble spot. Every threaded joint must be tested with a bubble solution while the line is live, and a faint rotten-egg smell afterward means stop, leave and call the gas utility. A gas unit also needs its exhaust to rise and exit properly. A wrongly pitched or loose vent can spill combustion gases back into the room.
Electric units fail differently. They need the right circuit, tight terminals and a dead-checked panel before anyone touches a wire. Filling the tank with the power on will burn out the heating elements within seconds, which is a common and avoidable mistake.
Then there is the old tank itself. If it has been leaking, the pan, the floor and the shutoff valves under it may need work before a new unit goes in. A seized shutoff valve that breaks off in your hand turns a Saturday project into a water-off situation for the whole house.
Radcliff water and your next tank
Hardin County Water District No. 1 says on its own FAQ that the spring-fed supply serving Radcliff is hard because of exposure to rocks and rocky soils. It does not publish a hardness figure in the places we checked, so we will not guess one.
For a water heater, that matters in two ways. Minerals settle as sediment in the bottom of the tank, and the sacrificial anode rod wears as it works. Both are reasons a tank can end up older than it looks. Test your tap, ask HCWD1 for its annual water quality report, and mention both to whoever installs the new unit.
Source type: HCWD1 utility FAQ.
DIY, helper or licensed plumber: a decision table
Use this to place your own job. If it lands in the right-hand column, book the work instead of starting it.
| Your situation | Handy owner can try | Bring in a licensed plumber |
|---|---|---|
| Electric tank, same size, same spot, dedicated circuit in good shape | Yes, with a helper and the breaker locked off | If wiring looks scorched or undersized |
| Gas tank with a standard draft vent | Rarely, only with gas fitting experience | Yes, for the gas line, vent and combustion check |
| Power vent or direct vent unit | No | Yes, vent pipe layout and condensate matter |
| Moving the heater to a new spot | No | Yes, new water, drain, fuel and vent runs |
| Old shutoff valves that will not close | No | Yes, they can break and flood the area |
| Switching fuel type or going tankless | No | Yes, sizing, gas supply and venting change |
| Heater is in an attic or tight closet | No | Yes, weight, access and leak protection |
Notice that the DIY column is short. That is not a sales pitch. It is a fair summary of how many jobs include a fuel, vent or wiring change.
The relief valve and its pipe
The temperature and pressure relief valve is the part that keeps a tank from becoming a pressure vessel with nowhere to go. It needs a discharge pipe that points downward, ends in a visible spot and has no cap, plug or upward bend. Never thread a cap onto it to stop a drip. If the valve drips, the cause is usually thermal expansion or excess pressure, and that needs diagnosing, not plugging.
Permits, insurance and who stands behind the work
Permit rules vary, so ask the city building department before you start. Some jurisdictions treat a water heater replacement as permitted work and some expect an inspection afterward. Asking first costs one phone call.
Insurance matters too. If an unlicensed install leaks or causes a fire, a claim can get complicated. Read your homeowner policy or ask your insurer how it treats owner-installed appliances. Also check the new heater's manual, because many manufacturers tie their warranty terms to installation by a qualified person.
If you decide the job is bigger than you want, our page on water heater installation explains what a licensed plumber checks on the way in. If the old unit is dying and you are weighing options, replacing a failing water heater covers repair versus swap.
Stop and call: warning signs during the job
Any of these means put the tools down.
- You smell gas at any point. Leave the building, then call the gas utility or 911 from outside.
- The vent pipe is rusted, loose, sagging or has soot stains around the joints.
- The shutoff valves will not fully close, or they weep when you turn them.
- The tank sits in a pan with standing water or has rust streaks on the floor beneath it.
- You are unsure whether the electrical circuit is rated for the new unit.
- The new unit's manual calls for a vent type or clearance your space cannot meet.
Tools and prep a safe swap would need
If you are doing an electric or like-for-like job, have this ready before you drain anything.
- Lock or tape the breaker off and test the wires with a voltage tester before touching them.
- Clear a path to the door and borrow a dolly, since a full-size tank is heavy and awkward.
- Buy new flexible connectors, a new relief valve and a discharge pipe in the sizes the manual lists.
- Place a bucket and a wet-dry vacuum nearby for the water left in the lines.
- Plan where the tank will drain, and make sure that spot is lower than the valve.
Frequently asked questions
A same-size swap with good access is often a few hours of hands-on work for a licensed plumber, plus time for the tank to fill and heat. A first-time DIYer should plan for a full day and a hardware store trip.
Anything that changes the vent, fuel line or location adds time, and so does a corroded shutoff valve.
You can in some places, but this is the version we would steer most homeowners away from. The gas fitting, the leak test and the exhaust path are all safety-critical, and a mistake may not show up until the unit has run for days.
If you do try it, test every gas joint with bubble solution and have the vent checked before you rely on it.
If the valve ever opens, the pipe carries scalding water to a safe spot instead of onto you or the floor. It should run downward and end where you can see it.
Never cap it and never route it so it can be blocked.
Permit rules vary, so ask the city building department before you start. Do not rely on a neighbor's answer, since requirements can differ by fuel type and by whether the unit moves.
A licensed plumber will usually know the local process and can tell you what to expect when you call.
Shut off the cold supply valve at the heater, turn off the gas or the breaker, and run a hose from the drain valve to relieve the tank. If the shutoff will not close, use the main water shutoff.
A leaking tank is rarely repairable. Call the 24/7 line if it is flooding or you cannot stop the water, and tell the dispatcher whether the unit is gas or electric.
HCWD1 describes its supply as hard, so sediment and anode wear are realistic concerns for any tank here. Flushing the tank as the manual directs and checking the anode rod when it is serviced are sensible habits.
Ask the water district for its yearly report, test your tap, and raise it with your installer.
Yes. See our pages for an emergency plumber in Vine Grove and an emergency plumber in Elizabethtown. Same-day appointments are offered when available, and the 24/7 line covers nights and weekends.