
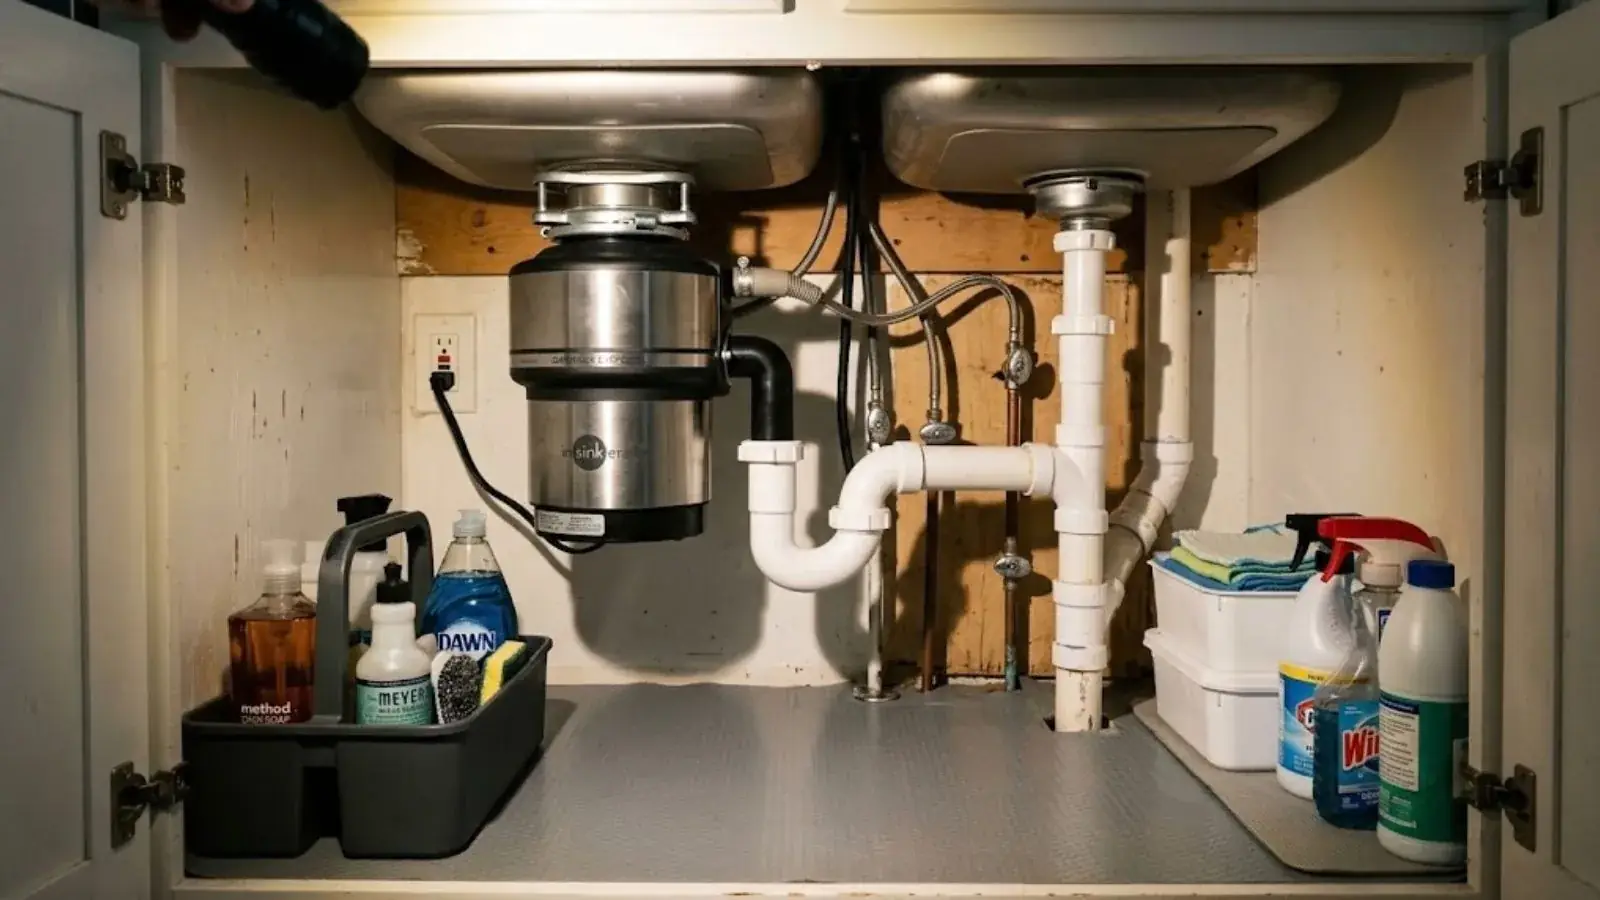
What the sink flange does
The sink flange is the metal collar that drops into the drain opening of a kitchen sink and holds the disposal underneath. A bead of sealant under its lip keeps water out of the cabinet. When a new disposal drips from the top of the unit or around the drain basket, the flange seal is the first place to look.
A first install usually takes a couple of hours with the right tools, and the flange step is the one that decides whether the cabinet stays dry. Most disposals ship with the flange, a fiber gasket, a backup ring, a mounting ring and a snap ring already in the box.
Tools and parts to lay out first
Gather everything before you start so the sealant does not skin over while you hunt for a screwdriver.
- Plumber's putty or silicone, as your sink and disposal instructions allow
- Flat screwdriver and a hammer or mallet for the mounting lugs
- Channel-lock pliers and a bucket for the old trap and drain
- Hacksaw if the new discharge tube needs trimming
- Dishwasher drain hose clamp, if a dishwasher connects to the unit
- A flashlight, gloves and a few rags
Putty or silicone under the flange
Both seal well when applied correctly. The difference is the sink material and how long you can wait before using it.
| Factor | Plumber's putty | Silicone sealant |
|---|---|---|
| Best for | Stainless steel and most cast iron sinks | Natural stone, some composite and sinks where putty is warned against |
| Cure time | None, but wait to run water per the label | Needs hours to set before water |
| Cleanup | Trims and wipes with a rag | Messier and harder to remove |
| Stain risk | Oils can stain porous stone | Low on most surfaces |
| Later removal | Easy to scrape and redo | Takes cutting and solvent |
Read the sink maker's note first. Some stone and solid-surface sinks specify silicone, and the disposal manufacturer may name a preferred sealant too.
Step by step: seat the flange and hang the disposal
Unplug the old disposal, or switch off its circuit at the breaker panel if it is wired directly, before any work starts.
Clear the old unit
Support the disposal, release the mounting ring by turning its lugs, lower it out, and remove the old flange and ring from above and below.
Clean and seal
Wipe the drain opening dry, roll a rope of putty about as thick as a pencil, and press it around the underside of the new flange lip.
Seat the flange
Drop it into the opening, press down, then add the gasket, backup ring and mounting ring from underneath.
Fit the snap ring
Seat the snap ring in its groove on the flange sleeve, then tighten the three mounting screws evenly until the flange sits flat and putty squeezes out.
Wipe and hang
Trim the squeezed-out putty from above, lift the disposal onto the mounting ring, and turn the lugs until it locks.
Reconnect the discharge and the dishwasher
Line up the disposal's discharge elbow with the trap, with its rubber gasket seated. Tighten the elbow bolts by hand and finish with a quarter turn of the pliers, since overtightening can split the gasket.
If a dishwasher drains through the disposal, knock out the plug inside the dishwasher inlet with a screwdriver and hammer before you attach the hose. Skipping this step is the most common reason a new disposal install leaves a dishwasher full of water. Fish the knocked-out plug out of the grinding chamber afterward.
Check that the new disposal sits level in relation to the trap. A strained joint will leak later even if it looks dry today.
Radcliff sewer service and your disposal
Hardin County Water District No. 1 operates the sewer system in Radcliff, and the district says on its FAQ that sewer bills are calculated from water use. Every gallon that runs through a leaking disposal drain is metered on the way in and counts toward the sewer charge too.
Fix a drip in the cabinet promptly instead of watching it. You can also tell the dispatcher whether the house is on city sewer or a septic tank, since that affects which plumber is sent and what to avoid grinding.
Source type: HCWD1 utility FAQ and About page.
Run the leak test
Fill the sink basin about halfway, then open the stopper and watch the flange, the mounting ring and every joint below with a dry paper towel. Repeat with the disposal running and cold water flowing. Check again after an hour and the next morning. A damp towel at any joint tells you which one to snug or re-seal.
Where a new install usually leaks
Where the drip appears points at the cause.
| Drip location | Likely cause | Fix |
|---|---|---|
| Top of the unit, around the drain basket | Putty too thin or flange not tightened evenly | Remove, re-seal, and tighten in rotation |
| Seam between flange and disposal body | Gasket or snap ring not seated | Reseat gasket and ring |
| Discharge elbow | Missing or pinched rubber gasket | Replace gasket and retighten |
| Dishwasher hose connection | Loose clamp | Tighten or replace clamp |
| Trap joints below | Misaligned or cross-threaded slip nuts | Re-fit with new washers |
| Body of the disposal itself | Cracked housing or failed internal seal | Replace the disposal |
Check the drain before you blame the disposal
A disposal that drains slowly or backs up into the second sink bowl may have nothing wrong with the flange. A greasy trap or a partial clog in the line past it will do the same thing. If water pools in the sink after a clean install, have the line looked at with a professional drain cleaning visit before assuming the new unit is faulty.
A cabinet that smells musty after the install should be dried and rechecked. Slow seepage soaks particleboard and shows up weeks later as swelling at the base.
When to hire a licensed plumber
The flange swap is a reasonable project. These situations are not:
- The sink is cracked, chipped around the opening, or the drain hole is not standard size.
- The trap and drain pipes do not line up and need cutting, new fittings or a re-pitch.
- There is no outlet under the sink and the unit needs new wiring, which is electrician work.
- Pipes are old, corroded or bound together with rusted nuts that will not budge.
- You are adding a disposal to a sink that never had one and the drain needs rework.
For a repair or replacement of an existing unit, our disposal repair service covers the swap. New fixture work and drain changes fall under new plumbing installation work. We dispatch to Radcliff and also to Vine Grove and Elizabethtown.
Frequently asked questions
Sometimes, but flanges are not always interchangeable between brands because the groove for the snap ring and the mounting ring style differ. Using the flange that ships with your new unit removes the guesswork. A mismatched flange is a common reason a new install drips at the top.
Usually the seal under the flange lip is too thin, was not wiped clean beforehand, or the mounting screws were not tightened evenly. Unhang the disposal, lift out the flange, remove the old sealant, re-seal with a fresh rope of putty, and tighten the screws in rotation.
Yes. Unplug the unit, or switch off its breaker if it is hardwired, before you touch it. Test the switch to confirm it is dead. Never put a hand in the grinding chamber, even when it is off, until the power is isolated.
It depends on the system, since ground food adds solids a septic tank has to handle. Check your septic service provider and the disposal manufacturer's instructions before installing. Tell the dispatcher which system you have so the right plumber is sent.
Putty does not cure the way silicone does, but read the label on the container. Many people wait an hour before the first leak test. With silicone, follow the cure time on the tube, which is often a full day.
Hardin County Water District No. 1 operates the sewer system in Radcliff, and sewer bills follow water use. The disposal and the plumbing inside your home are your side of the line. If you are unsure where the district's responsibility stops, ask HCWD1 before ordering any dig.